Dearest blog world: I promise I haven't forgotten about you. I know you've heard it all before, but I've just been so busy at school. Not only have I been doing lots of musical things, but I'm officially working my post at the library, as well. That's right, folks, I'm a real, honest-to-goodness reference librarian, complete with thick-framed glasses and a wheeled chair in which to pretend I'm doing actual work. Life is good!
On the home front, I've been dealing with some minor behavioral "incidents" with Oliver. These have mostly involved raucous trash parties, and some presents of the #2 variety in the living room. I usually call them "incidents" or "on-purposes," because I just know they're not "accidents." But who can stay mad at that face?
I also finally got around to re-upholstering the folding table and chairs in our living room. This card table and chairs was a wedding present to my parents thirty-something years ago. I took it with me to Boston when I lived there a few years ago, and my mom helped me re-upholster it then. While I still love the funky prints we found, they were looking a little worse for wear:
I took all of the seats and seat-backs out of the chair frames, and spray painted them gold. This part of the process did not go quite as I had planned, largely because of the plummeting temperatures and blustering winds on my back balcony in Cleveland. I wound up almost
completely covered in gold spray paint (as did the back balcony) while the chairs are spotty, at best. As luck would have it, the set was a golden-beige color to begin with, so I'm hoping I can get away with a shoddy paint job. Fingers crossed!
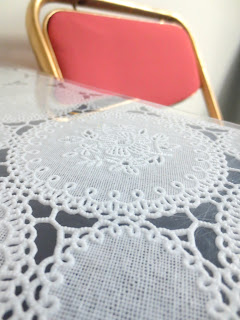
For the upholstery, I used navy blue cotton ($2/yard at Wal-mart) and a sheer pink polyester blend ($1.50/yard at Wal-mart.) I covered all of the chair pads, as well as the table top, in the navy blue cotton. For the chairs, I covered the navy with the pink, and I left the table navy. Cutting out the fabric was simple enough (and I used the previous upholstery pieces as general patterns) but getting the new pieces attached with the staple gun was a battle. Thank goodness for reliable (and strong-armed) help...I just knew Sean wanted to help me with a project when he visited! I love the combination of the dark navy, this peachy pink, and the gold frames. It was just what I had in mind! Overall, this project was pretty simple: just dissemble the table and chairs, cut out the pieces of fabric to cover the pads, staple them on, and re-assemble! My favorite part of the new setup is this lacy vinyl overlay that my mom found for me at a local craft store in Pennsylvania. My original intention was to cut it so that it fit on the table top, but I have yet to do so. I sort of like the way it looks as a table cloth, so I may try this out for a bit before I snip off the ends. It sits just under the glass top, and the white lace patterns contrast with the navy table top perfectly. Since it's vinyl, it wipes clean easily when I (inevitably, and quite often) spill food and/or coffee on it.


Happy Holiday Season, everyone! I hope you're feeling better than I am today (I'm suffering from my annual "the-semester-ended-so-I'm-immediately-sick" cold.) But this is giving me some much-needed time to do a little bit of catching up, and Ollie is certainly an adorable sick buddy. Happy Monday, and thanks for stopping by!


