Showing posts with label color. Show all posts

Saturday, September 20, 2014

Have Beer, Will Travel: Bike Six-Pack Holder Tutorial

Hello, hello, hello!  I know it’s been a little while…but I’m back with the long-ago-promised tutorial for a bike-safe six-pack holder (I know you’ve been waiting with bated breath, and quite frankly I can’t imagine how you’ve gotten along thus far without it!  My most sincere apologies from keeping you from this vital information.)  But hey! Enough chat.  Let’s get to it!


This 6-pack carrier has strips of Velcro on the inside, so that in addition to being a regular carrier, it opens flat so that it can be draped over a bicycle bar for easy transport. 

Monday, December 10, 2012

Table fancy

Dearest blog world: I promise I haven't forgotten about you. I know you've heard it all before, but I've just been so busy at school. Not only have I been doing lots of musical things, but I'm officially working my post at the library, as well. That's right, folks, I'm a real, honest-to-goodness reference librarian, complete with thick-framed glasses and a wheeled chair in which to pretend I'm doing actual work.  Life is good!

On the home front, I've been dealing with some minor behavioral "incidents" with Oliver. These have mostly involved raucous trash parties, and some presents of the #2 variety in the living room. I usually call them "incidents" or "on-purposes," because I just know they're not "accidents." But who can stay mad at that face?


I also finally got around to re-upholstering the folding table and chairs in our living room.  This card table and chairs was a wedding present to my parents thirty-something years ago.  I took it with me to Boston when I lived there a few years ago, and my mom helped me re-upholster it then.  While I still love the funky prints we found, they were looking a little worse for wear:

 
I took all of the seats and seat-backs out of the chair frames, and spray painted them gold. This part of the process did not go quite as I had planned, largely because of the plummeting temperatures and blustering winds on my back balcony in Cleveland. I wound up almost completely covered in gold spray paint (as did the back balcony) while the chairs are spotty, at best.  As luck would have it, the set was a golden-beige color to begin with, so I'm hoping I can get away with a shoddy paint job.  Fingers crossed! 

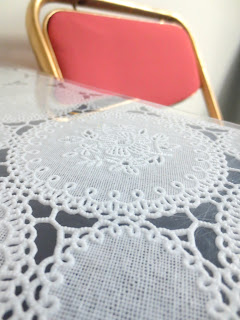
For the upholstery, I used navy blue cotton ($2/yard at Wal-mart) and a sheer pink polyester blend ($1.50/yard at Wal-mart.)  I covered all of the chair pads, as well as the table top, in the navy blue cotton.  For the chairs, I covered the navy with the pink, and I left the table navy.  Cutting out the fabric was simple enough (and I used the previous upholstery pieces as general patterns) but getting the new pieces attached with the staple gun was a battle.  Thank goodness for reliable (and strong-armed) help...I just knew Sean wanted to help me with a project when he visited!  I love the combination of the dark navy, this peachy pink, and the gold frames.  It was just what I had in mind!  Overall, this project was pretty simple: just dissemble the table and chairs, cut out the pieces of fabric to cover the pads, staple them on, and re-assemble!   My favorite part of the new setup is this lacy vinyl overlay that my mom found for me at a local craft store in Pennsylvania.  My original intention was to cut it so that it fit on the table top, but I have yet to do so.  I sort of like the way it looks as a table cloth, so I may try this out for a bit before I snip off the ends.  It sits just under the glass top, and the white lace patterns contrast with the navy table top perfectly.  Since it's vinyl, it wipes clean easily when I (inevitably, and quite often) spill food and/or coffee on it.




Happy Holiday Season, everyone!  I hope you're feeling better than I am today (I'm suffering from my annual "the-semester-ended-so-I'm-immediately-sick" cold.)  But this is giving me some much-needed time to do a little bit of catching up, and Ollie is certainly an adorable sick buddy.  Happy Monday, and thanks for stopping by!

Friday, October 26, 2012

Tablecloth curtains

In keeping with my last couple of projects, I finally finished the curtains that I started a few weeks ago.  I had gotten rather used to them sitting in a semi-folded pile on top of Oliver's crate, but I do think they look better hanging!  They were just so simple, and I'm glad I finished them before the weather really turned to winter here in Cleveland.  Curtains just make everything seem a bit cozier, don't they?


I made them out of some white cotton lining fabric I'd been holding onto for a couple of months, and a teal tablecloth that I found in the clearance section of TJMaxx.  I'm not quite sure what the the tablecloth is made of (it was shelved sans packaging or tags) but I just loved the embroidered detailing...and for around fifteen bucks, it was quite a steal!  Since it was a large rectangular shape, I simply cut it into four pieces (two panels per window) and hemmed the unfinished edges.  To make up the difference in length (since the tablecloth wasn't quite long enough to cover the window) I cut four rectangles of the lining fabric that were about the length of the windows, but with some width to spare (as you can probably tell, I'm not exactly nit-picky with measurements.)  I hemmed the edges, and folded the top edge over two inches to make a casing for the curtain rod.  I picked up some double curtain rods, and that was it!

I just can't get enough blue these days, so I'm loving the added color in my bedroom.  I'm slowly but surely working through my list of home projects...so on to the next!  Happy Friday!

Wednesday, July 4, 2012

Holiday morning snapshots

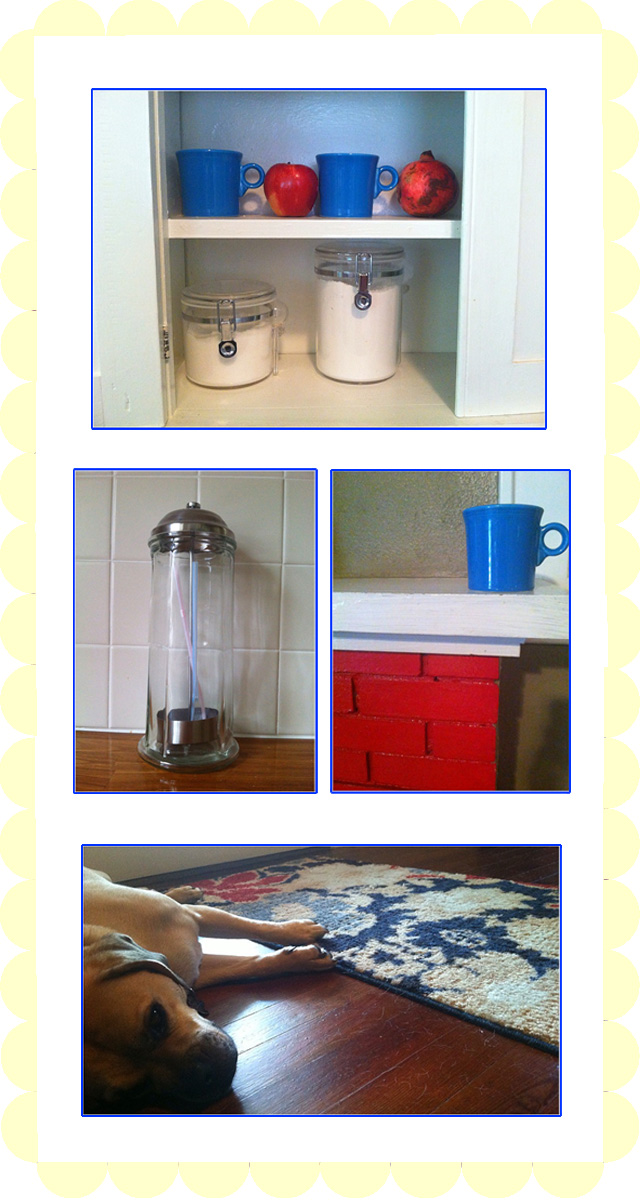
Happy 4th of July!  I hope your plans for the day include food, friends, sunshine, and sparklers.  Since my day includes working, I took advantage of my morning off by bumming around the house.  But since it is July 4th (and since red, white and blue is one of my favorite color combinations) I'm sharing some of my favorite red, white, and blue photos from around our house.


Happy 4th of July!  Go have fun!

Monday, May 7, 2012

Back in the saddle

It's been a wild week!  In the midst of finding a new place to live, getting a job, having some lovely out-of-town visitors, running our first-ever 5k, and a little trip to the puppy ER (those darn fire ants!) I got back in the sewing saddle this week.  I put together a few little projects, including the completion of a project using this fabric that I dyed back in good-ole' Pennsylvania.  I used the fabric to make another "Flirting the Issue" skirt, and here's the finished product:


Because of all of the elastic at the top (and also because the results of my first venture into DIY ombre dying were slightly more subtle than I had hoped) I lost some of the ombre effect once the skirt was put together.  But I love my little skirt anyway!  I used a sunny yellow cotton lining, and I just love that the little white dots didn't take the teal dye on the outer pieces.  This is the perfect addition to my Florida wardrobe...it can get pretty warm at this time of the year!

I have a few more projects to share this week so stay tuned!  I hope you had a wonderful weekend and thanks for stopping by!

Sunday, April 8, 2012

Happy Easter!

Hello, friends!  I hope you all are having wonderful and relaxing Easter weekends.  I saw this marbleized egg-dying technique on the Martha Stewart website, and have been wanting to try it ever since.  My mom and I had decided not to really dye eggs this year, but when I mentioned I wanted to do these, she ran out and bought some white eggs and a color kit.  They were so fun to do (albeit rather messy!) and they actually came out sort of like the pictures on Martha's website (which is a miracle, considering my track record with Martha's projects.)  Here are my perfectly imperfect marbleized eggs:


Aren't those little bunny candle-holders adorable?  These eggs were the perfect festive project for me today, and I love them so much I don't want to crack them and eat them!  Now if only I could get enough of the dye off of my hands so that they resembled human hands again, I'd be one happy girl.  I'm sure that will happen eventually.  Anyway, happy Easter weekend!

Friday, February 3, 2012

Tote bag throwback

Things have been a little crazy lately.  I've been traveling a ton, playing a ton, and posting lots of cool things to share with you all.

...that last one might not be completely truthful.  I wish it was!  I'll try to snap some pictures to share on my next couple of trips, which are quickly approaching.  But in the midst of audition season, I have been spending much more time behind this instrument:


and much less time behind this instrument:


Therefore, I decided to share another project that I completed some time ago.  Since I have had embroidery on the brain lately (more projects to come later this month...) I wanted to share one of my favorite past embroidery projects.  I'm a steadfast supporter of reusable grocery bags, so I bought this plain canvas tote and made it a little more fruity.


The patterns for the fruit as well as the text came from this delightful book by Jenny Hart.  The border was a last minute addition...because fruits like to be organized, right?  This was one of my most practical and enjoyable projects.  I'm thinking this bag might need a veggie-themed pal!

I'm off to Cleveland tomorrow for Audition #4, so I'll catch up with y'all when I return!  Have a great weekend!  (...I think there is a football game or something?)

Thursday, January 19, 2012

The whole kit and kaboodle

Since I had a relatively free day on my hands, I spent the day practicing and sewing.  Today I worked on an Anna Maria Horner kit I received for Christmas. While I was a little scared to cut into the fabric that came with my kit (it's just so cute!) I dove right in, and was able to complete the project in a few hours.  The process was undoubtedly slowed down by two things: my little helper (see below) and  my valiant attempt to sew while also watching The Bachelor .


Despite my numerous distractions, the Ruthie Clutch was a success!


I used the kit as intended, with one small change.  While I had enough fabric to line the bag with the main exterior fabric, I realized that if I swapped out the lining for something else, I would have enough of this lovely print left for another project!  How exciting, right?!  So instead of lining the bag with the exterior fabric, I swapped it out for some light blue cotton I had laying around.  I think it's a nice contrast!


The bag is a cute shape, a practical size, and a smart design.  I can't wait to use this pattern again and again!